🔨 Learning Half-Lap Joinery by Trial and Error: My First Real Taste of Woodworking
- Gavin Lottering
- May 21, 2025
- 2 min read
Updated: May 23, 2025
When I started building a modular shelf unit, I didn’t plan on becoming obsessed with half-lap joints. But here I am, a few weeks in, and I’ve not only learned how to make clean, functional half-laps—I’ve learned how to fix them, too. And honestly, that might be the most valuable lesson of all.
🪚 It Started with a Shelf
The project is a tall, freestanding shelving unit made from Douglas Fir 2x2s and 2x4s. I designed it to be modular and knock-down—easy to move, but strong enough to support real weight. I planned to use half-lap joints for the horizontal crossbars and shelf frames to keep the structure clean, square, and traditionally joined.
The only problem? I’d never actually done one before.


🔧 Trial #1: Close, But Gouged
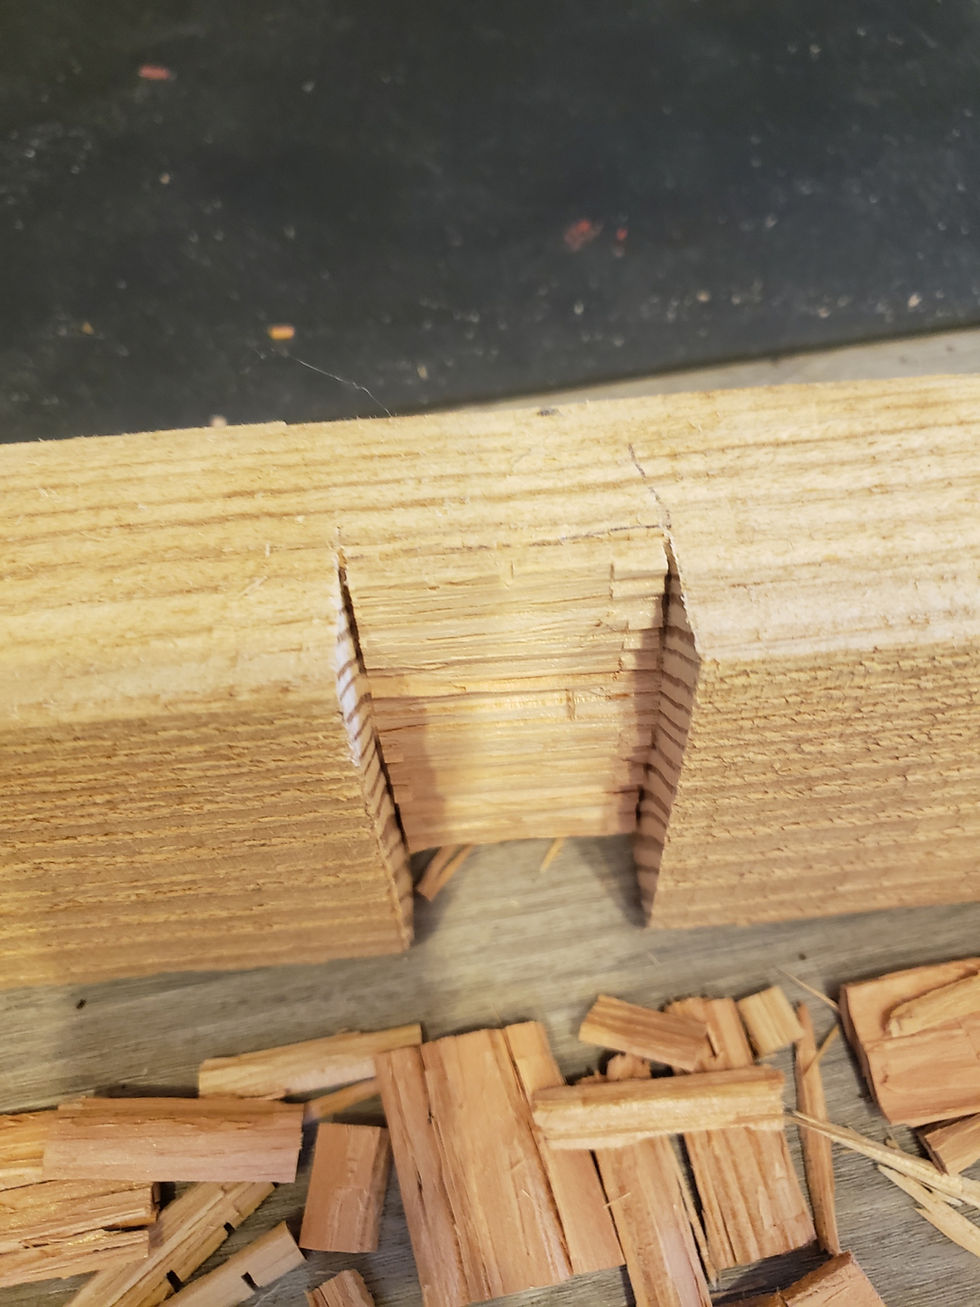
I started with a handsaw and a chisel. My first attempt wasn’t terrible—but the thin chisel dug in too deep. The bottom of the joint wasn’t flat, and the shoulder was ragged. Structurally okay, but not something I was proud to show off.


🛠️ The Fix: Better Tools + Smaller Bites
I picked up a few tools that made a huge difference: some Japanese tools, a hand router, a sharp dovetail saw and a speed square. Then I changed my approach—cutting the waste area into thin slices (kerfs), and chiseling them out layer by layer. I started working with the grain instead of against it, and suddenly things felt a lot smoother.
Douglas Fir can be a little splintery, but it’s also forgiving. The wood seemed to reward precision and patience, especially with a sharp chisel.

🧱 Learning to Repair
Of course, not every joint went perfectly; I had made that mistake on the first one. Rather than scrap it, I glued in a thin piece of matching wood, let it dry, and will shave it flush. It worked beautifully—and now that joint is back in play (it won't really be visible when it's finished). That little success reminded me that mistakes are just part of the build.
📚 What I’ve Learned
Cut in layers. The more you treat chiseling like peeling an onion, the better your results.
Mark everything clearly. Knife lines and square markings are your best friends.
Sharp tools matter. A dull chisel will ruin your day.
You can always fix it. Most woodworking mistakes are recoverable with glue, patience, and a little thinking.
✨ What's Next?
I’ve still got more half-laps to cut as I finish this shelf, but now I’m excited instead of nervous. It feels like something I can repeat. Something I can teach, even.
And for the first time in this project, I don’t feel like I’m just learning woodworking—I feel like I’m becoming a woodworker.


Comments